Showing posts with label Rhubarb. Show all posts

Wednesday, May 1, 2013

Early Spring Update 2013

Things are really picking up now on the farm! Here is a few of the things we've been up to...

Our newest laying hens are really getting too big for our small brooding coop and their new home is just about done! Here are a couple of photo's...

We still need to add roosts and egg boxes but it's looking really good!


It has been very dry so far this spring but because the ducks love the water soooooo much we usually fill the turtle pool once a day for them to splash and play in. They are so fun to watch!

Our rhubarb is just getting going, we hope to have a bumper crop this year!

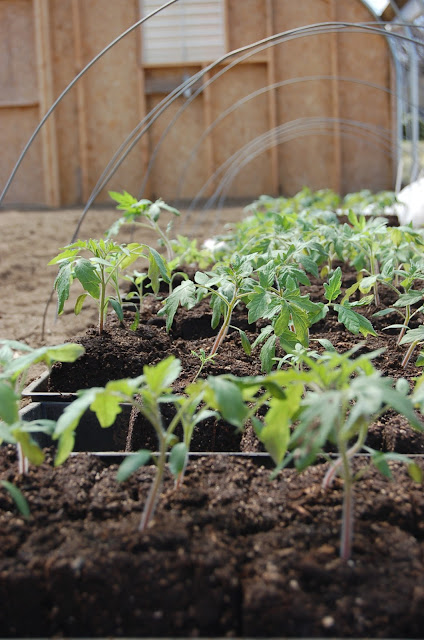
Our tomato seedlings have just been transplanted into large soil blocks. We are keeping the in the green house with an extra layer or two of row covering over them at night just in case. 

Outside we have lettuce, broccoli, and cabbage in. We are using row covers on these also, mostly to keep away those pesky cabbage loopers.

Our first batch of broiler chickens have arrived. Also ordered three guinea hens to help keep the tick population down.




Sunday, November 13, 2011

Some End of Season Photo's


 Gardens are all cleaned up and tilled, we will be adding manure and other soil amendments to help with the mineral deficiencies in our soil as we have the time. We are thankful to have this first growing season under our belts so that we can learn from it and improve next year!

This photo is looking at the outside garden and house #1.


  Inside house #1 we have our parsnip bed still intact. Hoping the ground will freeze enough on the outside edge to give us sweet and delicious parsnips in the spring!


 Standing in front of house #2 and looking towards the pond you can see a freshly tilled addition to our rhubarb patch. Beyond that is a large patch that was tilled to help out with a crop being tested by another farm. Along the edge of that same bed we added about 50 strawberry plants and lots of garlic.


 A beautiful fall evening! This is a view from the back of house #1 looking towards the bee hives and Mt. Washington in the background.

Sunday, July 3, 2011

Nana's Rhubarb Pie and Rhubarb Tips

Our first recipe made with our own produce was this rhubarb pie (scroll all the way down for the recipe). After transplanting this patch of rhubarb back in the early spring (see this post) we thought we would have to wait a year before harvesting any. We thought wrong! We have picked close to 10lbs. of rhubarb already and it is still coming! We have some different opinions about what to do with it though... some want to eat it! Some want to freeze it and store it away for the winter when it will be a welcomed reminder of spring.
The 7.5lbs picked this past week went into the pie above and the freezer so all would be happy.

As you can see from the photo below taken yesterday the rhubarb is still coming along nicely! If your patch does not look quite so nice there are some things you can do.

Tips for Great Rhubarb:
1. Rhubarb loves organic matter so be sure to load on the manure each season.
2. When you see flower stalks shooting up, pull them out right away before they blossom. This is a sign that your plants need to be divided. It is best to divide plants during the spring or fall when the plant is dormant.
3. Rhubarb likes fertile well drained soil with a PH of 5-6.8 and little to no weeds.
4. Rhubarb does like a little shade, ours is pretty much in sun all day except the evening when the end wall casts a shadow. It does not tollerate very hot and dry areas.
5. Don't forget to water! Lot's of water and some fertilizer will keep your plants going strong into the summer.
For more details on growing rhubarb click here.
Nana's Rhubarb Pie

1 batch of pie dough for a double crust pie
1c. sugar
2T. flour
a dash of nutmeg
1 egg
6-8 cups chopped rhubarb

Roll out bottom crust and fit it into your pie plate. Combine all filling ingredients and pour over the bottom crust. Top with second crust and seal by pinching tightly around the edge.
Bake at 350 degrees for 50-60 minutes.


Thursday, May 26, 2011

First Planting

Welcome to Grandview Farm!
Our family is so excited to get started with this adventure in growing our own food!
Here is a photo of the newly broken ground at the site where the high tunnels will be placed.

Here Sarah is applying the first dose of lime.

Paul and Ethan tilling the Asparagus bed so that we can get our first veggies in the ground!

We then had to come behind the tractor and pick up rocks, lots of rocks!

If you look closely you'll see the 75 or so asparagus plants happily in their new home. Now we wait... 2 or 3 years, a long time for these little delights!

We then relocated a patch of Rhubarb that was in desperate need of a new home. This rhubarb patch has been relocated several times but came from the original Grandview Farmhouse across the street.

Mark gives them a little drink once in the ground.

A little down time after a hard days work!